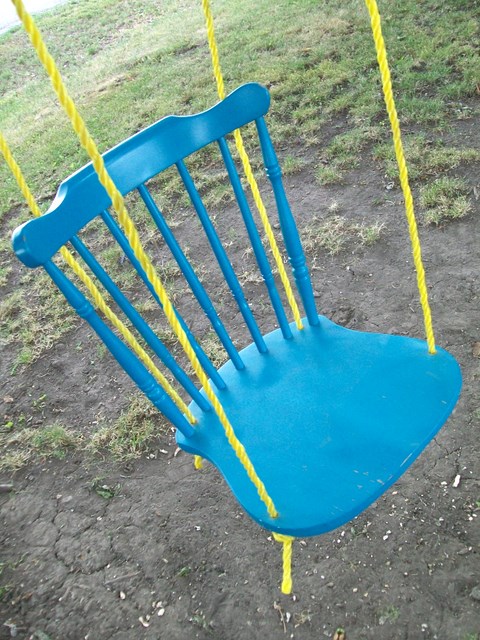
One of the first things that I pinned on Pinterest was this swing that I knew would go perfect in our backyard on this amazing old maple tree we have!

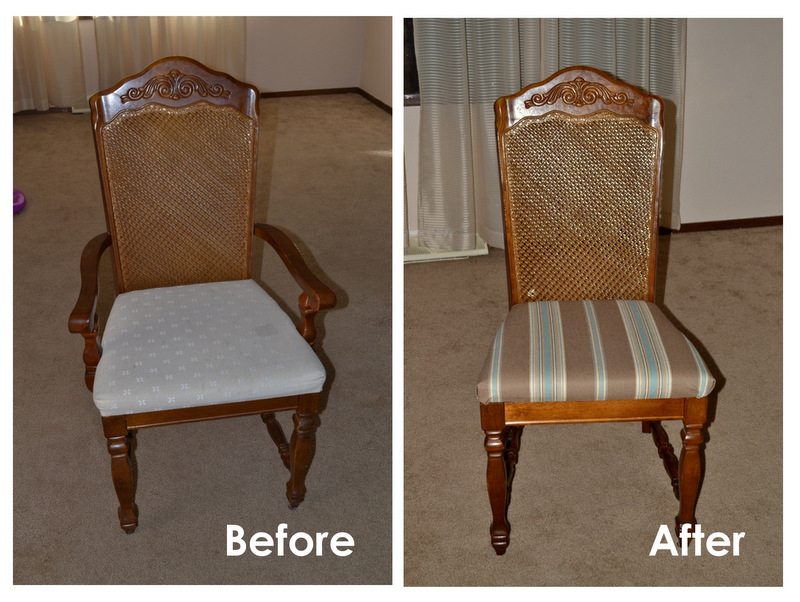
I knew my nieces would so love this and if I painted it a color other than pink, my nephews would love it too! The search for a chair was on. I wanted the perfect chair for this project, something similar to this one and I refused to pay much for it. I live pretty close to a decent size city, not big, but not a small town either. We have three Goodwill stores in town a few consignment stores and a Salvation Army, so finding a chair should have been easy. While it felt like it took forever, in hindsight and comparatively speaking, finding the chair was the easy part. In fact I found one that looked almost identical to this one. I picked up the chair for a whole $6.38 and a can of paint for $2.74 and took my new project home. The painting process didn’t go as smooth as I’d hoped, but in the end I got this. If you’d like to see how the whole painting process went and how I finally got to this, you can check out this post.
 Next was the hanging process which should be pretty easy. Sometimes when you DIY things, you end up putting a lot more time and energy into a project than you ever could have anticipated, but usually those end up being the projects with the best results. I checked out the inspiration pin website to see just how they hung their swing and it wasn’t in English. It also wasn’t in French, Italian or Spanish, so I was pretty much out of luck at reading this website without any help. Enter Michael who broke out Google Translate and got it to where we could read it. Then we realized that we didn’t really like the way that one was hung. It had been attached to a regular swing, so from another angle it looked like this

Back to the drawing board. According to This Old House and Martha Stewart our idea of just throwing the ropes over the tree limb was not the correct way to do that either. Ropes thrown over can seriously damage the tree and because this is our favorite tree, we certainly didn’t want that to happen. Oh…my…word. Seriously? Could this get more difficult? Yep! It took a couple hours, three drills and two trips to town, but we got the eye bolts hung on the tree to support the swing when we got to the point to hang it in this post
Hopefully it will save you some of the headaches we endured. But now it was time to hang the swing. I found 100 yards of 3/8″ rope at Harbor Freight for $7.99 and thanks to a 20% off coupon I got it for $6.39.
I didn’t go out looking for yellow rope, but it’s what HF had plus I think it goes well with the bright colored chair. I’m all about bright unexpected things in our 1910 house in a small town atmosphere.
I copped a squat in the backyard with my rope, my legless chair, fence pins and my trusty pink hammer. Let’s do this! I figured the fence pins would work perfect for attaching the rope and having it not slide anywhere. In the (p)inspiration post there are four of these things so it must work right? Something like this
Well I ended up with something like this where the pin refused to stay in.
I also got another something like this where it split the wood to pieces.
Time to revamp…again. Michael and I chat chitted a little about it and decided on a plan of action. The chair needed more holes. I wanted the rope to be tight so we used a 13/32 drill bit (where do they come up with these sizes?) and made one here
and another one that I didn’t get a picture of, but you’ll see it. Michael decided that we needed to have a test run for it so we just threaded the rope through the holes in the chair and through the eye bolts in the tree just to see how it would look
Oh I love it! Now if we didn’t want to be able to take the chair down we probably could have left it up like this
Okay, it’s not really “up” right there, but you get what I’m saying right? Because we live in Iowa and get snow (lots and lots of snow) and this tree happens to be right in the wind line of snow that blows across a cornfield if we left it up year round, it may not last as long as we’d like it to. Plus when you swing forward, the chair tips forward and dumps you right out if you’re not careful – don’t ask how I know, I just do and it might be a little embarrassing. Down the swing came and I went to work tying the knots the way Roger (from This Old House) told me to.

I’d never tied a bowline knot before so this was a fun experience.
Nailed it! We didn’t tie the swing directly to the eye bolts. Instead, we listened to Martha and we’re going with a clip to attach the swing to the eye bolt for easy removal. It will also make it easy to put back up if the nieces and nephews want to swing and jump into a pile of fluffy white snow.With the knot tied it was time to hang the swing…finally. But guess who forgot to get the clips (she asks sheepishly knowing it was her)? There was no way I was going another day without this swing hung up! So I cut two small pieces of rope and just tied them in loops through the eye bolt and through the thimble and the swing was almost ready!!!!
I did some research online and found that the swing should be 1-2 feet off the ground. I pulled the rope through the holes in the chair until it was the height we needed. First with the back
Then the front allowing the chair to tip back just a little bit.
I cut the straggling ends off the rope and it’s ready for a small child. Once we have the clips, I have no doubt it will hold an adult too.
Maybe I need to go swing and jump into a pile of fluffy snow this winter. We’ll need to put something below just in case someone decides to swing too high. Despite all the problems and issues, I’m so glad I did this…and even more glad that I had the help of my supportive husband who goes along with my projects even when he doesn’t quite see where I’m going with it. Ready for the project cost breakdown? Here it is
- Dining room chair from Goodwill – $6.38
- Lagoon paint (Rust-oleum 2x spray paint) – $2.74 on sale
- Clear coat (Rust-oleum 2x in satin finish so little bottoms don’t slide off) – $2.74
- 100 yards of 3/8″ rope – $6.39 after coupon and we didn’t use all the rope
- 2 eye bolts (1/2″ cause I couldn’t find 5/8″ ones) – $7.98
- 4 heavy duty washers – $1.49 for a package of 6
- 2 lock washers – $1.18
- Total cost – $28.90
I just know that Hunter, Landon, Mikayla, Adicyn, Evalee, Reygan and our “proxy nieces” Abby and Hannah will have some fun times sittin’ on the front porch in our backyard just a swingin’! If you try this, you have to promise to let me know. I love show and tell!! Thanks for letting me share mine with you!


That’s such a neat idea!
Thank you!
I am LOVING that chair swing! I want one for me 🙂 Who says any of us have to grow up?!
I totally agree with you! Can’t say we haven’t used it a couple times 😉
cute! I want to swing… that would be much better than working!
Thanks. Sometimes I walk by a window just to look at the swing in the back yard. I will be so sad when we take it down for winter.
Pingback: Pinterest Challenge – The Results « Daisies and Spurs
Pingback: Put your stuff up in the air! Hanging DIY ideas & tutorials
Pingback: DIY Chair Swing - Decor Hacks | Decor Hacks
Pingback: DIY Rocking Chair Tree Swing | Old Into New
Thanks for making this an easy to understand tutorial!! I’m buying a chair tomorrow to do this! I will send you the end results!!
I would love to see it when you finish it! Also let me know if you have any questions.
What type of knots under chair is the best for a 150pd “big kid”?
We just used a standard knot. Nothing special. It was a double knot so it was pretty strong. Hubs and I both sat on it just fine.
This looks like a lot of fun!!! I was wondering if you had tried looping the rope under seat and back up to avoid knots? I am going to have to find a chair tomorrow and get started on this.
That was my plan at first, but I couldn’t get the rope to stay in place. It may have just been the chair I was using too. We ended up with the knots because I was afraid the rope would slip with someone on it.
Pingback: DIY Rocking Chair Tree Swing - I Love DIY
My question is, When you used the thimbles and rapped the rope around what did you do with the rope in the front of the chair, because both ropes won’t fit around the thimbles.
We actually just used one long piece of rope per side (left and right) rather than two. The middle of the rope is what we wrapped over the thimble. The knot is tied at the bottom of the thimble and one end goes to the front and the other end goes to the back. I hope that helps!
Pingback: DIY Rocking Chair Tree Swing
Pingback: DIY Rocking Chair Tree Swing
Pingback: Garden SwingEstroo | Estroo
Pingback: DIY Rocking Chair Tree Swing!
Pingback: Build a Kid-Friendly Backyard Oasis
Pingback: 8 New Uses for Old Chairs
Pingback: DIY Garden Swings | The Garden Glove
Pingback: DIY Garden Swings | 100% Realtors
Pingback: diy porch swings | inspiringhomestyle
Pingback: DIY Garden Swings - EverythingOrganized.Org
Pingback: How to make an outdoor swing from an old chair | Creative Home Ideas
Pingback: How to Easily DIY Swing from Old Wood Chair | www.FabArtDIY.com
Pingback: Garden Swing, un'altalena da una vecchia sedia ;) | Questo lo riciclo Ti Piace L'Idea?
Pingback: 14 DIY Projects That Will Make You Want to Go Outside | Wearable-Technology.Co
Pingback: 14 DIY Projects That Will Make You Want to Go Outside | Sharing Interesting Stuff, Updates News & Free Tips
Pingback: 14 DIY Projects That Will Make You Want to Go Outside | News Feed
Pingback: 14 DIY Projects That Will Make You Want to Go Outside | Hihid News
Pingback: 14 DIY Projects That Will Make You Want to Go Outside | Sharing With You
Pingback: How to Easily DIY Swing from Old Wood Chair | CRAFT WORLD
Pingback: Hanging wooden chair tutorial - Andrea's Notebook
Pingback: DIY Rocking Chair Tree Swing | Content inspirations
Pingback: DIY Rocking Chair Tree Swing | Diy & Crafts
Pingback: DIY Garden Swings
Pingback: DIY Rocking Chair Tree Swing | Health Daily Artile
Pingback: 40 Impressive DIY Ways To Repurpose and Reuse Broken Household Items Part 1 | eKanpSack
Pingback: 40 Impressive DIY Ways To Repurpose and Reuse Broken Household Items Part 1 | HeySup
Pingback: DIY Rocking Chair Tree Swing | Mister Gand Me Crafts
Pingback: DIY Rocking Chair Tree Swing | DIY Gems
Pingback: 20+ Fabulous DIY Patio and Garden Swings | www.FabArtDIY.com
Is it shaky at all? Like unbalanced?
Maybe a little bit. But it’s not bad. More that the tree limb isn’t straight so one swings longer than the other. I’m trying to figure out a way to change that a bit. When I do, I promise I’ll post
Pingback: 22 Amazingly DIY Patio and Garden Swings |
Pingback: Awesome DIY Swings For Kids And Adults - DIYCraftsGuru
Pingback: 20 Old Things You Can Transform Into Exciting New Decor | CutesyPooh
Pingback: 20 Old Stuff Transformations That Can Breathe New Life Into Your Home – My Home Inspiration
Pingback: Reuse everyday items around your home for a making each moment into an incident ⋆ BrassLook
Pingback: Best DIY Furniture Makeover Ideas & Tutorials for Kids
Pingback: 10 DIY Patio and Garden Swings - Home and Gardening Ideas
Pingback: 23 Erstaunliche Möglichkeiten, alte Möbel für Ihre Inneneinrichtung umzuwandeln - Neue Ideen
Pingback: 27 Creative Ways To Repurpose Old Stuff And Giving Them A New Life |
Pingback: 6 Backyard Upcycling Ideas for Earth Day - MJJ Sales
Pingback: 20 Old Stuff Transformations That Can Breathe New Life Into Your Home - LinkSplit
Pingback: Easy Recycled Chair Swing DIY Tutorials - DIY Tutorials
Pingback: 20+ Ways to Give a Second Life to Things We Usually Throw Away – Requires News
Pingback: 20+ Methods to Give a Second Life to Issues We Often Throw Away - Social Love
Pingback: 20+ Ways to Give a Second Life to Things We Usually Throw Away | Viral Panda
Pingback: 20+ Ways to Give a Second Life to Things We Usually Throw Away – Viraltimestar