I told you Friday about a trip that I took to get tires put on our car after having one blow out. I also told you that there was a JoAnn Fabrics on my way home. Convenient, right? Hobby Lobby was also on the way home, but I drove by. Look at me being good and saving money. I felt so completely out of sorts after that, so I did stop at Caribou for a Campfire Mocha…I get weak in the knees just thinking about it. But anyway, I wanted to share with you my project from JoAnn.
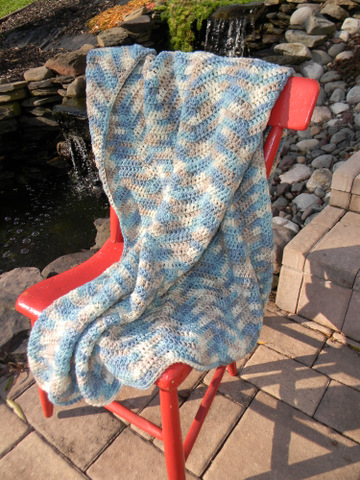
I’ve been looking for some artsy thing to go on the wall in the sideboard corner. Earlier in the week, I had made a trip to the town closest to us that has more stores than just a gas station. I found some fabric that I thought would be a perfect wall hanging there. If you like the fabric and want your own, here’s the link to find a store in your area.

Then when I was at JoAnn, I found this frame

Factor in that this was on clearance, I knew I could make it work

Then I had to decide which way I wanted. With or without the mat.

I liked the look sans mat better, but knew it would be more work so I sent the pictures off for a couple more opinions. Wouldn’t ya know it, but they liked the more work way too. So I set off to work.The size of the frame was 16×20, but I wanted to measure just to make sure. So I measured the opening from the back and it was just a little bit smaller than 16…good thing I measured.

Then I cut up a piece of foam core. Measure twice cut once, I wanted to leave a little room for the fabric to wrap around the board and for the pins that I would be using to hold it in place so I cut it slightly smaller than the opening. An eighth of an inch gave me just enough room.

Just like when I was cutting the foam core for my fabric organizers, I used a super sharp razor blade to cut it for this too. This time, to make it a little easier, I borrowed Michael’s box cutter

I started off pinning. Back in a previous life (about 5 years ago), I used to be in custom framing. So I can tell you that this is how the pros do it. You can totally do this yourself and it will save you quite a bit of cashola. If you are ambitious enough to complete a cross stitch project and then have it framed, this is how they would probably stretch it. So much more permanent than just using sticky back board. Start off pinning one edge so you know what straight is. Then stretching as you go, pin the other three sides. Remember to pull it tight so you don’t see bubbles in the fabric.


After it’s all stretched, cut the extra fabric off of the back. The good thing about using the foam core was that I just ran my rotary cutter along the edge and cut it right off. It was almost ready to be framed. The excess fabric on the back needed to be taped down to help with the stretch a little bit. I just used clear packing tape.

The corners were folded to have a sharp edge and not let the fabric bubble…and here’s a picture of me trying to hold down the fabric and take the picture with my right hand. Oh if only you could see the other 7 attempts to get this picture.

At this point, if you’re like me, you will take all the tape off, pull all the pins out and restretch it around the correct piece of foam core. Hopefully you stretch yours on the right one in the first place. But either way, the piece gets put into the frame and then the back put on.

When I “test fit” the frame above the sideboard, I didn’t like it. It was too small and it just didn’t feel like that was it’s home. I tried one more place and it was perfect. When you come down our stairs there is a wall. We see if every morning and several times a day and it’s been a blank slate of latte since we moved in. Before we moved in, it was this wallpaper

I think this is an improvement. What do you think?

You can see it from the dining room which ties in with the orange placemat that Lumiere sits on

You can see it from the door in the entry room where we usually walk in the house and the green coordinates with the green in the state art that hangs in there

There is only one question left. Why in the world did we wait so long to put something there? Especially when it cost so little
- Frame – $10 at JoAnn on clearance
- Fabric – $5 for half a yard from my local fabric store (check out this link for where you can get it)
- Foam Core Board – $2 at Hancock Fabrics
- Sewing Pins – $2 at Hancock Fabrics
- Total – $19
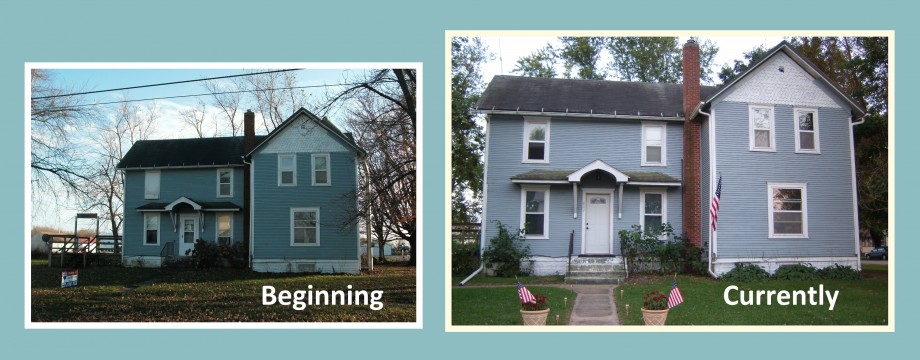
Less than $20 for something to make me smile every morning? I call that a win! Now, we just need to put a light at the end of the stairs, so we can see it a little bit better. We’ll get there eventually. There’s a lot to do in this house! If you’re a regular visitor to my little spot on the internet, you may have noticed that I’ve done some updating on the pages at the top. This right brained girl is figuring out this web coding stuff…who knew? At the top of the page, you can “Tour Our House”

Right now, there are three tours you can take. One of the whole house from the beginning and two shorter tours of progress in the kitchen and the entry room. As I find time in between projects here and helping plan my middle brother’s wedding, I’ll be adding the progress of other rooms to there too. Don’t forget to check it occasionally.
I hope you all have a great spring weekend! As always, I’d love to see the projects you’re working on! Post them on our facebook page or tweet them to me. Seeing other people getting stuff done motivates me. Come on, motivate me people!


Cute! This is the first time I’ve been to your blog and I will definitely be looking around . We are also working on our 1890s Victorian and blogging about it. We’ve been working on our front porch for the last couple weeks and we’re hoping to finish it up (enough to post about it anyway) by Sunday night.
I just clicked over to look at your house. Looks like we have some similar situations 🙂 I’m completely jealous that you have a front porch. It’s on my wish list of things to add within the next 10 years. Your half bathroom looks so much like ours too! Thanks for stopping by!!!